How to Draw Accurately Without Using a Grid
Download the FREE e-book lesson and save it for later.
Have you ever gotten to the end of a drawing…and realized that something was “off”?
Maybe the eyes were too far apart? Or, maybe the entire shape of the head was wrong, leaving your drawing looking lopsided and “just not quite right?”
And now, after you’ve meticulously balanced the value throughout your drawing and you’re just about ready to “make it yours” by adding your signature...You realize you’ve made a mistake and going back to fix your drawing is either going to be a massive hassle or completely impossible.
Don’t worry, you aren’t the first artist to stumble upon this frustration...Many promising drawings and paintings have flopped due to a poor foundation.
The great news is that it’s totally preventable!
Artist Darrel Tank has perfected a method for not just laying out your drawings accurately, but checking your accuracy as you go! He reveals his simple, but effective, solution for creating accurate drawings.
It can be done with just one simple tool and you don’t need an art degree (or quantum physics degree to understand it.
Today we’re going to share with you a quick step-by-step guide, taken directly from an 8-class drawing series, where Darrel drew an entire portrait and explained the ins-and-outs of mastering this unique drawing layout technique.
Find out how you can avoid the heartbreak of discovering inaccuracies too little, too late!
Download the FREE e-book lesson and use it off-line.
Let’s jump into Darrel’s recipe for accuracy!
Step 1
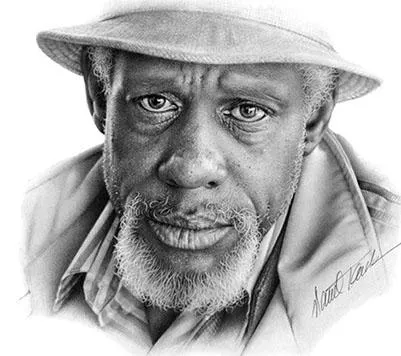
It all starts with a reference photo.
Download and print the reference photo.
Print a copy of the reference photo.

If it’s on regular paper, consider mounting to cardstock or a scrap piece of drawing paper.
Step 2
Now we start with that one simple tool. It is just a straightedge. A clear plastic ruler works well; but we’re just using it as a straightedge, not to measure anything.
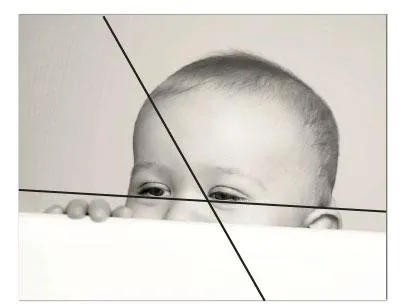
Download and print the modified reference photo above.
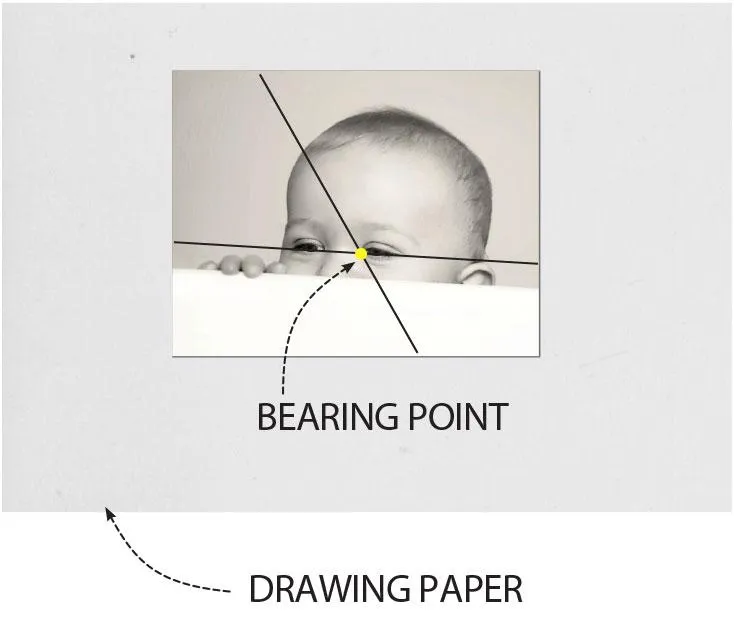
Using your straightedge, make VERTICAL and HORIZONTAL bearing lines on your reference photo.
The bearing lines do not need to be exactly parallel with the sides or top and bottom of your drawing paper. It helps if it they can intersect two distinct points in your reference photo such as the corner of an eye, and edge of a tooth or top of an ear or corners of the eyes.
In this case we are using the left tear duct of left eye and right tear duct of right eye for the HORIZONTAL bearing line.
For the VERTIACL bearing line we use the left tear duct of the right eye and a noticable place on the hair line.
Step 3
Select the placement on your drawing paper.
Position the reference photo on your drawing paper at the desired placement. Then hold your pencil at the BEARING POINT on your reference photo and pull the reference photo out and mark the point on your drawing paper.
Download and print the modified reference photo example above.
Step 4
a) Transfer bearing lines to your drawing paper.
Align your straightedge on the vertical bearing line on your reference photo.
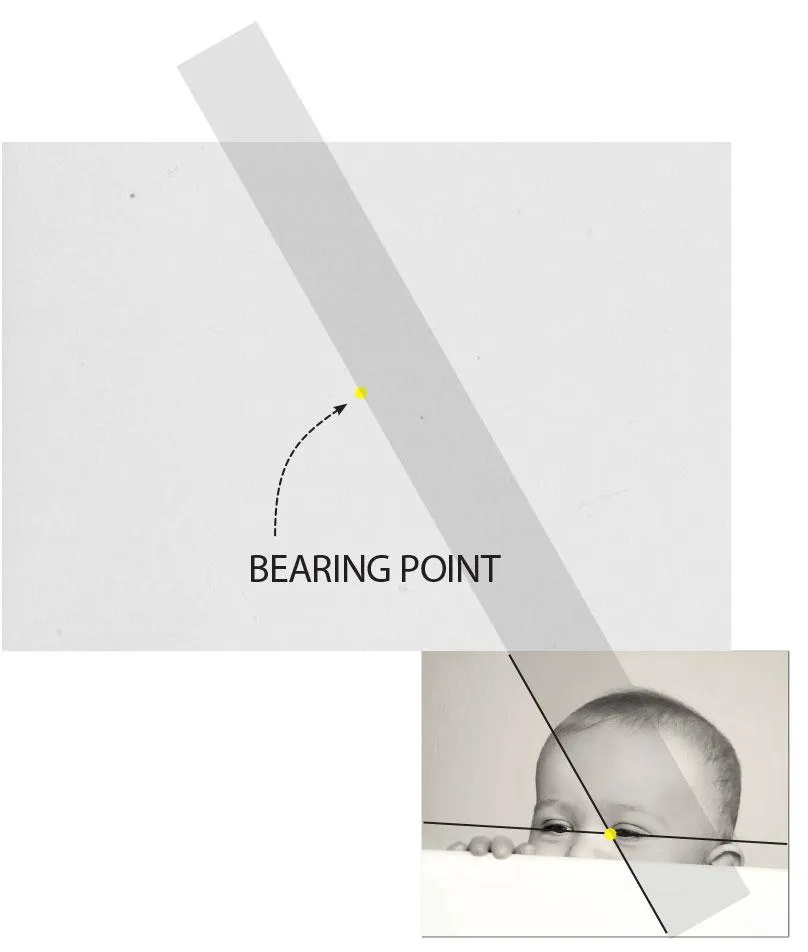
b) Line up the two bearing points.
Now, keeping the straightedge and reference photo “locked” together, slide your reference photo parallel along the bottom of the drawing paper to align the ruler with the bearing point you made on your drawing paper.
Lightly pull your pencil along the straightedge to make your vertical bearing line at the same angle as the vertical bearing line on your reference photo.
Watch Darrel Tank demonstrate this process.
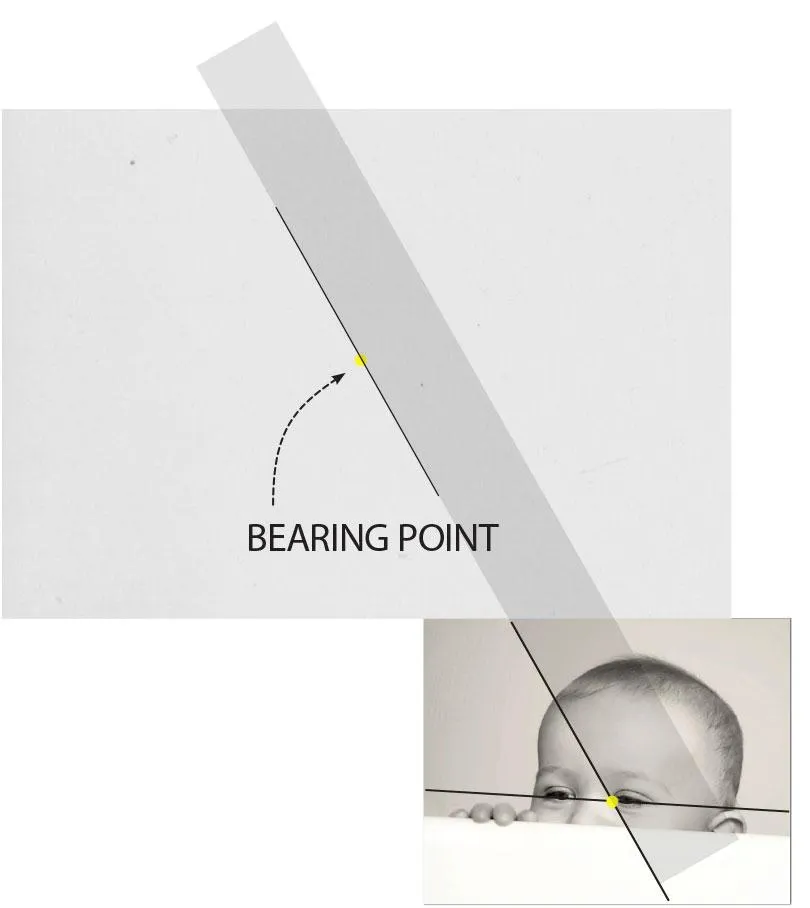
c) The HORIZONTAL BEARING LINE
Repeat process to draw the HORIZONTAL BEARING LINE
Step 5
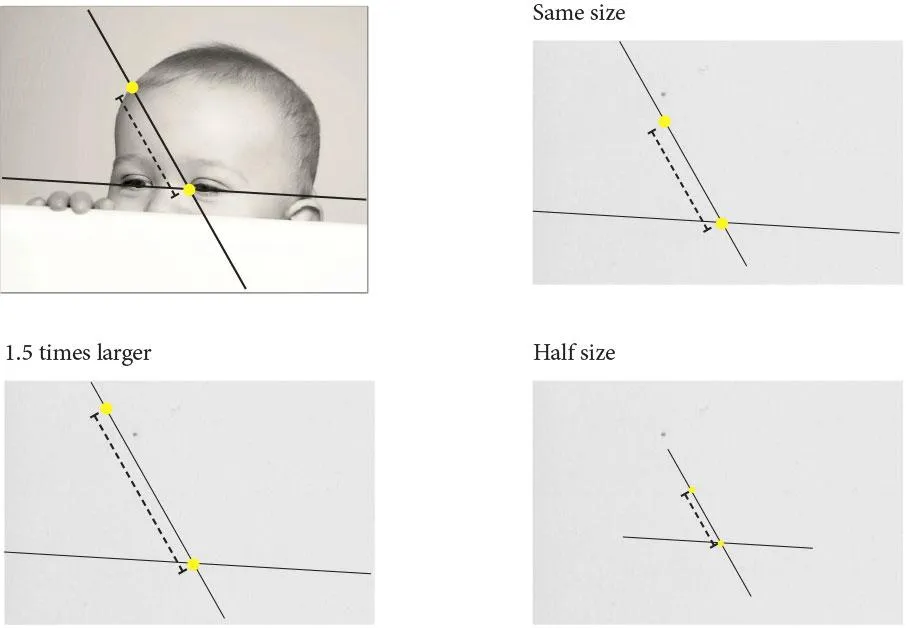
a) Measure between REFERENCE and BEARING Points.
With a pencil or your straightedge, “measure” the distance between the BEARING POINT and another REFERENCE POINT on the vertical bearing line on your reference photo.
Watch Darrel Tank demonstrate this process.

b) Choose the SIZE of the drawing.
For a drawing that’s the SAME SIZE as your reference photo, make a point on the vertical bearing line on your drawing at the same distance as it is on your reference photo.
If you want to make your drawing LARGER than your reference photo, make the points further apart.
If you want to make the drawing SMALLER than your reference photo, make the points closer together.
Step 6
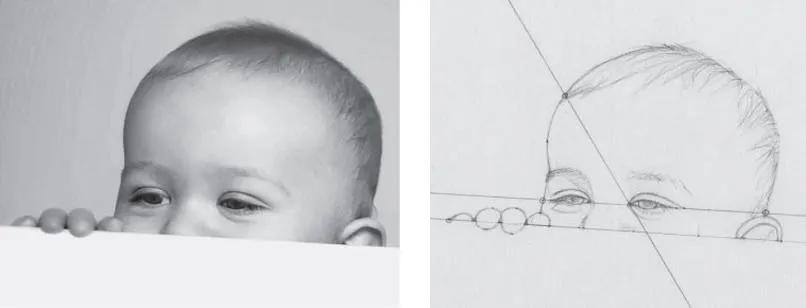
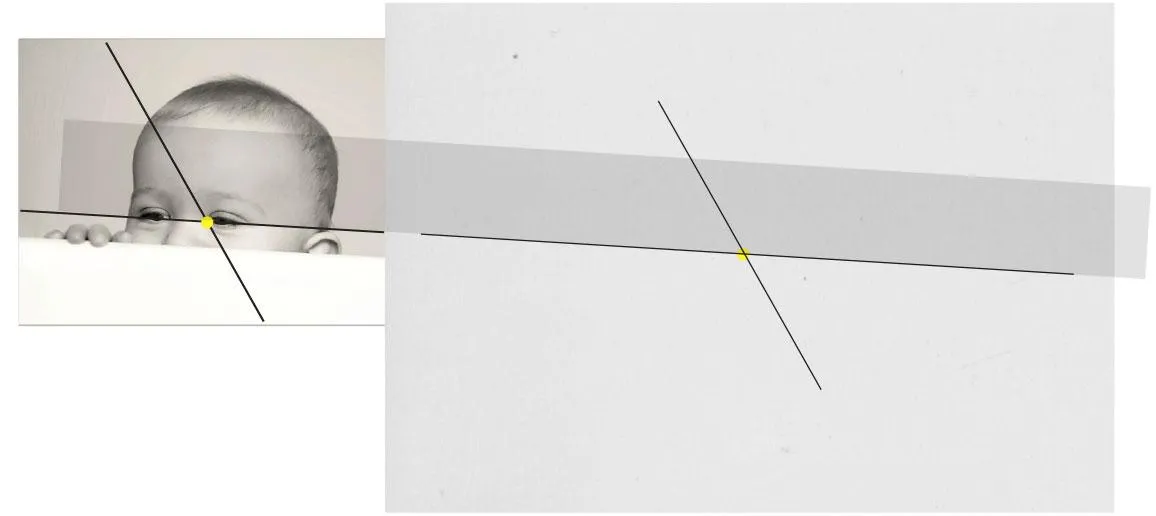
a) Plot Reference Points.
A reference point is a recognizable point on your reference photo such as the corner of an eye, mouth, tooth, nose, or a place where a bearing line crosses an edge.
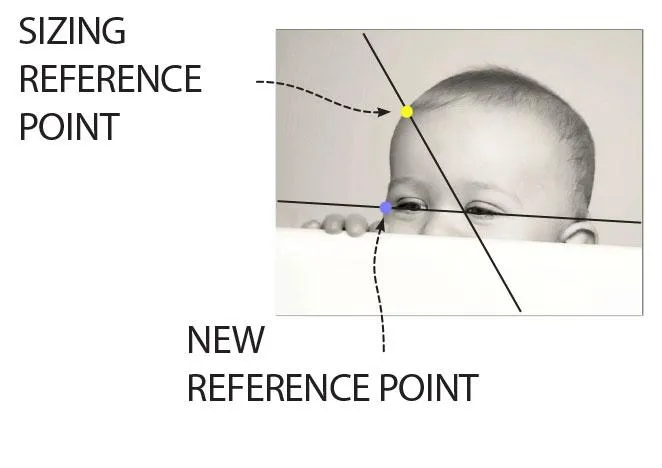
b) Plot New (Third) Reference Point.
With the photo and straightedge “locked” to the “yellow” and “blue” points, keep the photo parallel to the drawing and align the straightedge with the “yellow” point on the drawing.
Watch Darrel Tank demonstrate this process.
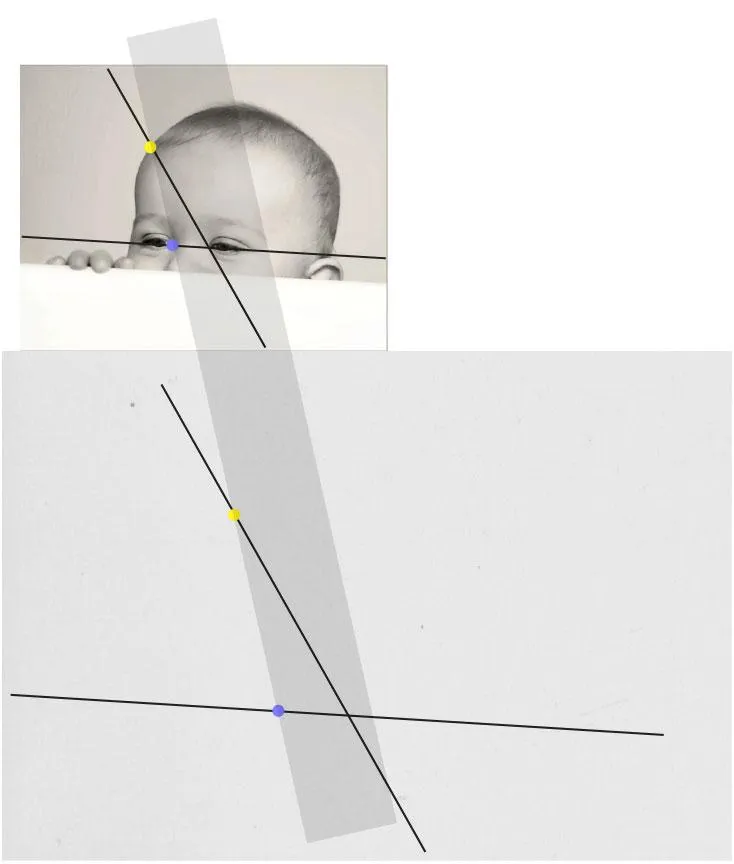
Mark the point where the straightedge crosses the HORIZONTAL BEARING LINE.
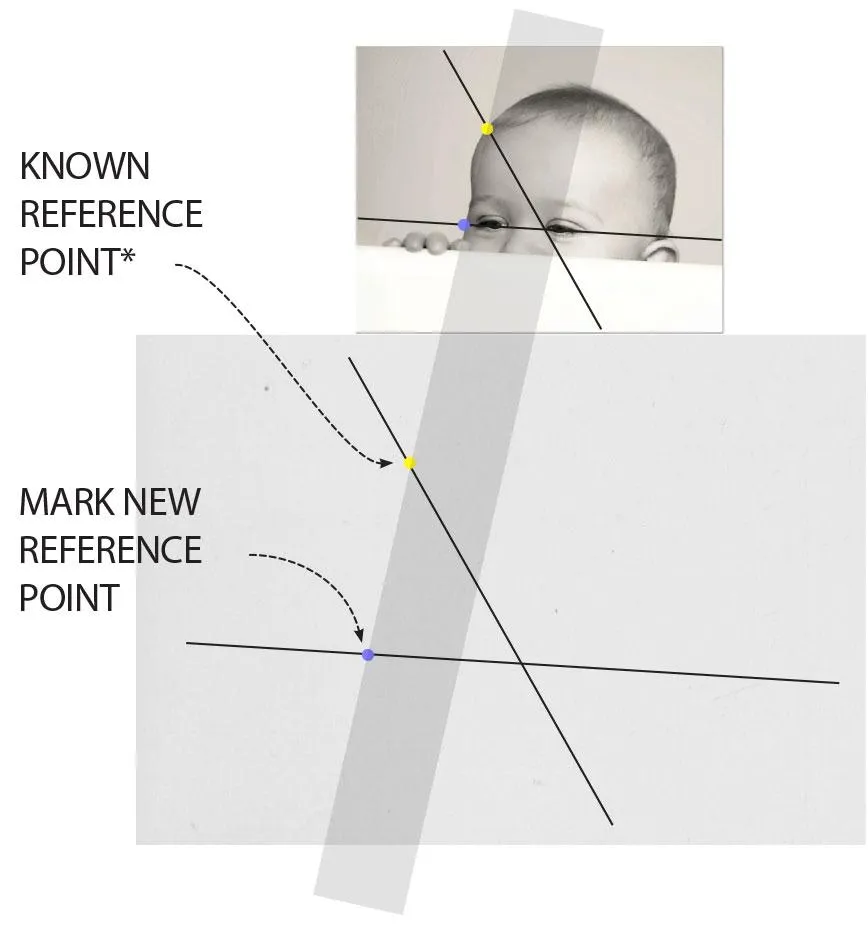
Example for finding edge of head (blue points.)

Example for finding corner of eye (blue points.)
Voila! You've got what it takes to draw anything with confidence and accuracy...
So, now what?
Go forth and be creative!
Other Posts You Might Like!
7 Common Mistakes When Drawing a Portrait — And How to Avoid Them!
Which Pencils Work Best for Drawing?
Discover How a “Lightbox” Can Help You Experience the Joy of Drawing Sooner!
Start Drawing Faster, With Greater Accuracy — No Extra Tools Required!
Daddy's Hands: How to Draw Life-Like Hands That Tell a Story! (Behind-the-Scenes)
The Artist and Teacher
Meet Darrel Tank

Darrel Tank is a professional artist and educator with over 45 years of experience.
His greatest strength lies in his ability to demystify and declutter the art of drawing, making it fun, formative, and completely accessible to anyone!
His drawings and illustrations have been featured in over 400 publications.
His unique 5-Pencil Method drawing DVDs and online classes have inspired countless artists from around the world.
Darrel invites you to pick up a pencil, grab your paper, and discover the joy of drawing for the first time or all over again!
Five Pencil Method is a DBA of Darrel Tank Graphic Productions.
Support Email: [email protected]
© Copyright 2026. Darrel Tank Graphic Productions. All rights reserved.
Draw-Without-A-Grid